Fully Native Cross-Platform Swift Apps
In our series on using native Swift on Android, we have covered the basics of the Swift-Android toolchain in Part 1, bridging between compiled Swift and Kotlin in Part 2, and the creation of a cross-platform app with a shared Swift model layer in Part 3.
We are pleased to unveil the culmination of all of this work: Skip 1.5 now has the ability to create a 100% native Swift and SwiftUI app for both iOS and Android! You can now enjoy the safety, efficiency, and expressiveness of pure Swift throughout your entire cross-platform app, including the ability to tap into the vast ecosystem of Swift packages to support your app development.
This blog post will go over the process of creating and developing a Swift cross-platform app, explore the underlying technologies, and discuss our current status and next steps.
Getting Started
Section titled “Getting Started”Ensure that you are on a macOS 14+ machine with Xcode 16 ↗, Android Studio 2025 ↗, and Homebrew ↗ installed.
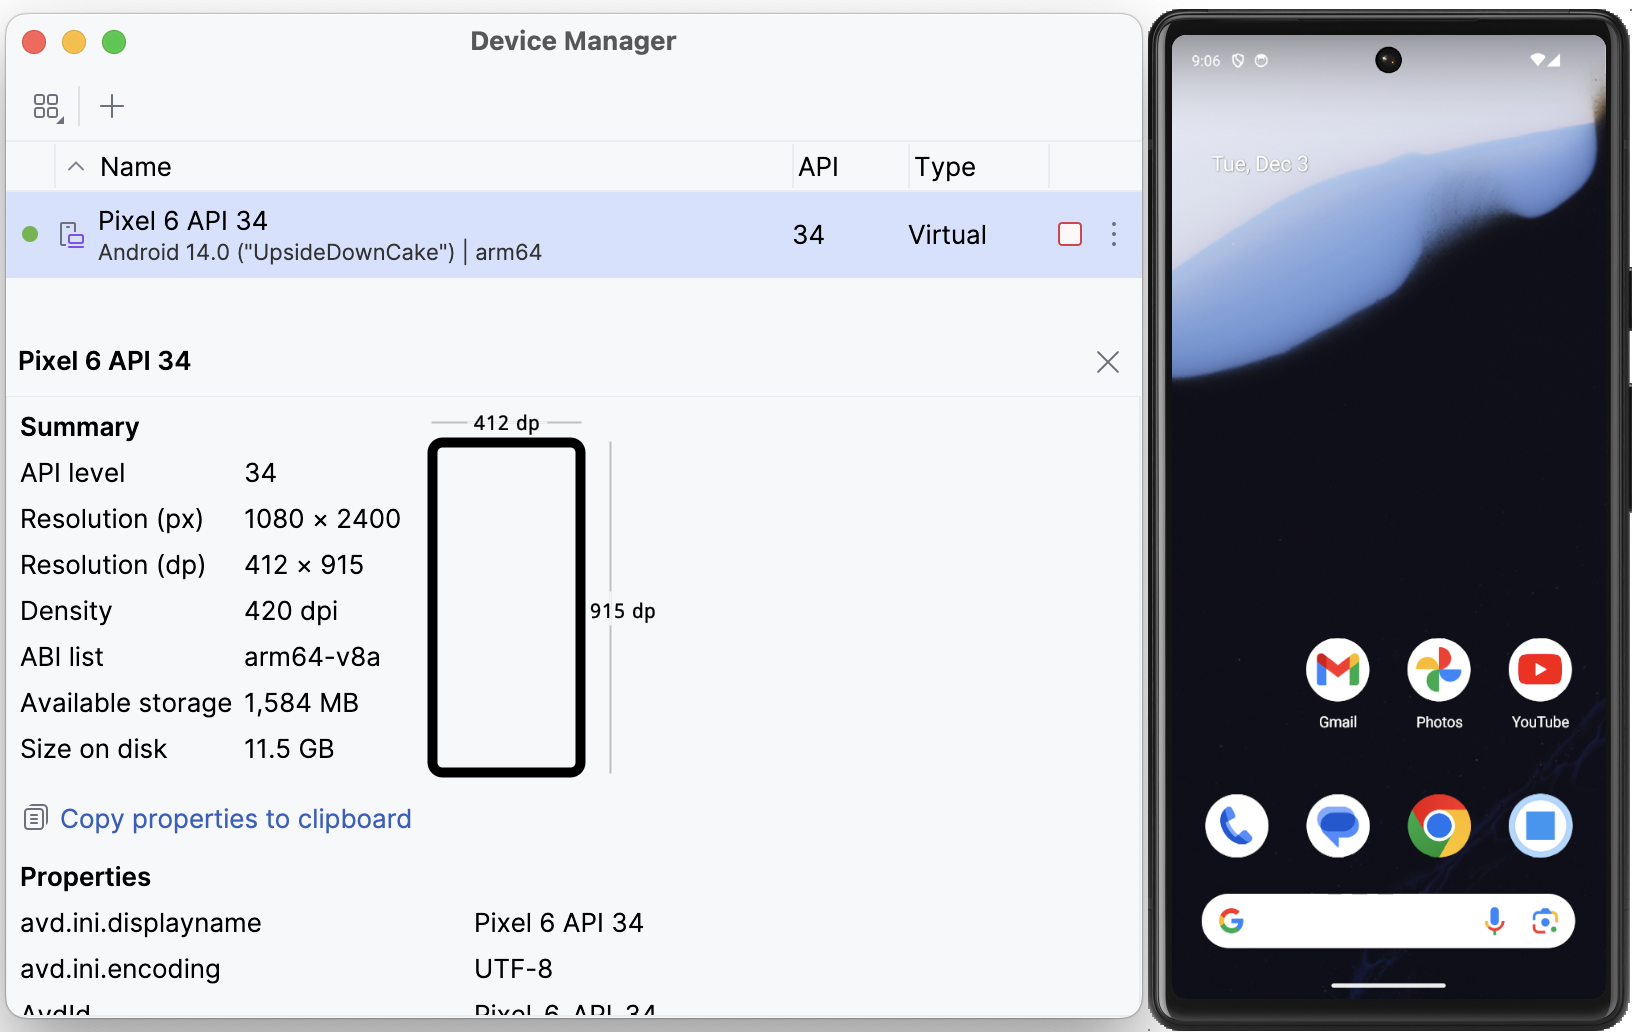
First, create and launch an Android emulator ↗ for testing.
Next, open Terminal and type the following commands to install Skip and the native Swift-Android toolchain.
$ brew install skiptools/skip/skip$ skip upgrade$ skip android sdk installVerify that everything is working with an additional Terminal command:
$ skip checkup --nativeYou’re now ready to create your first fully native cross-platform Swift app:
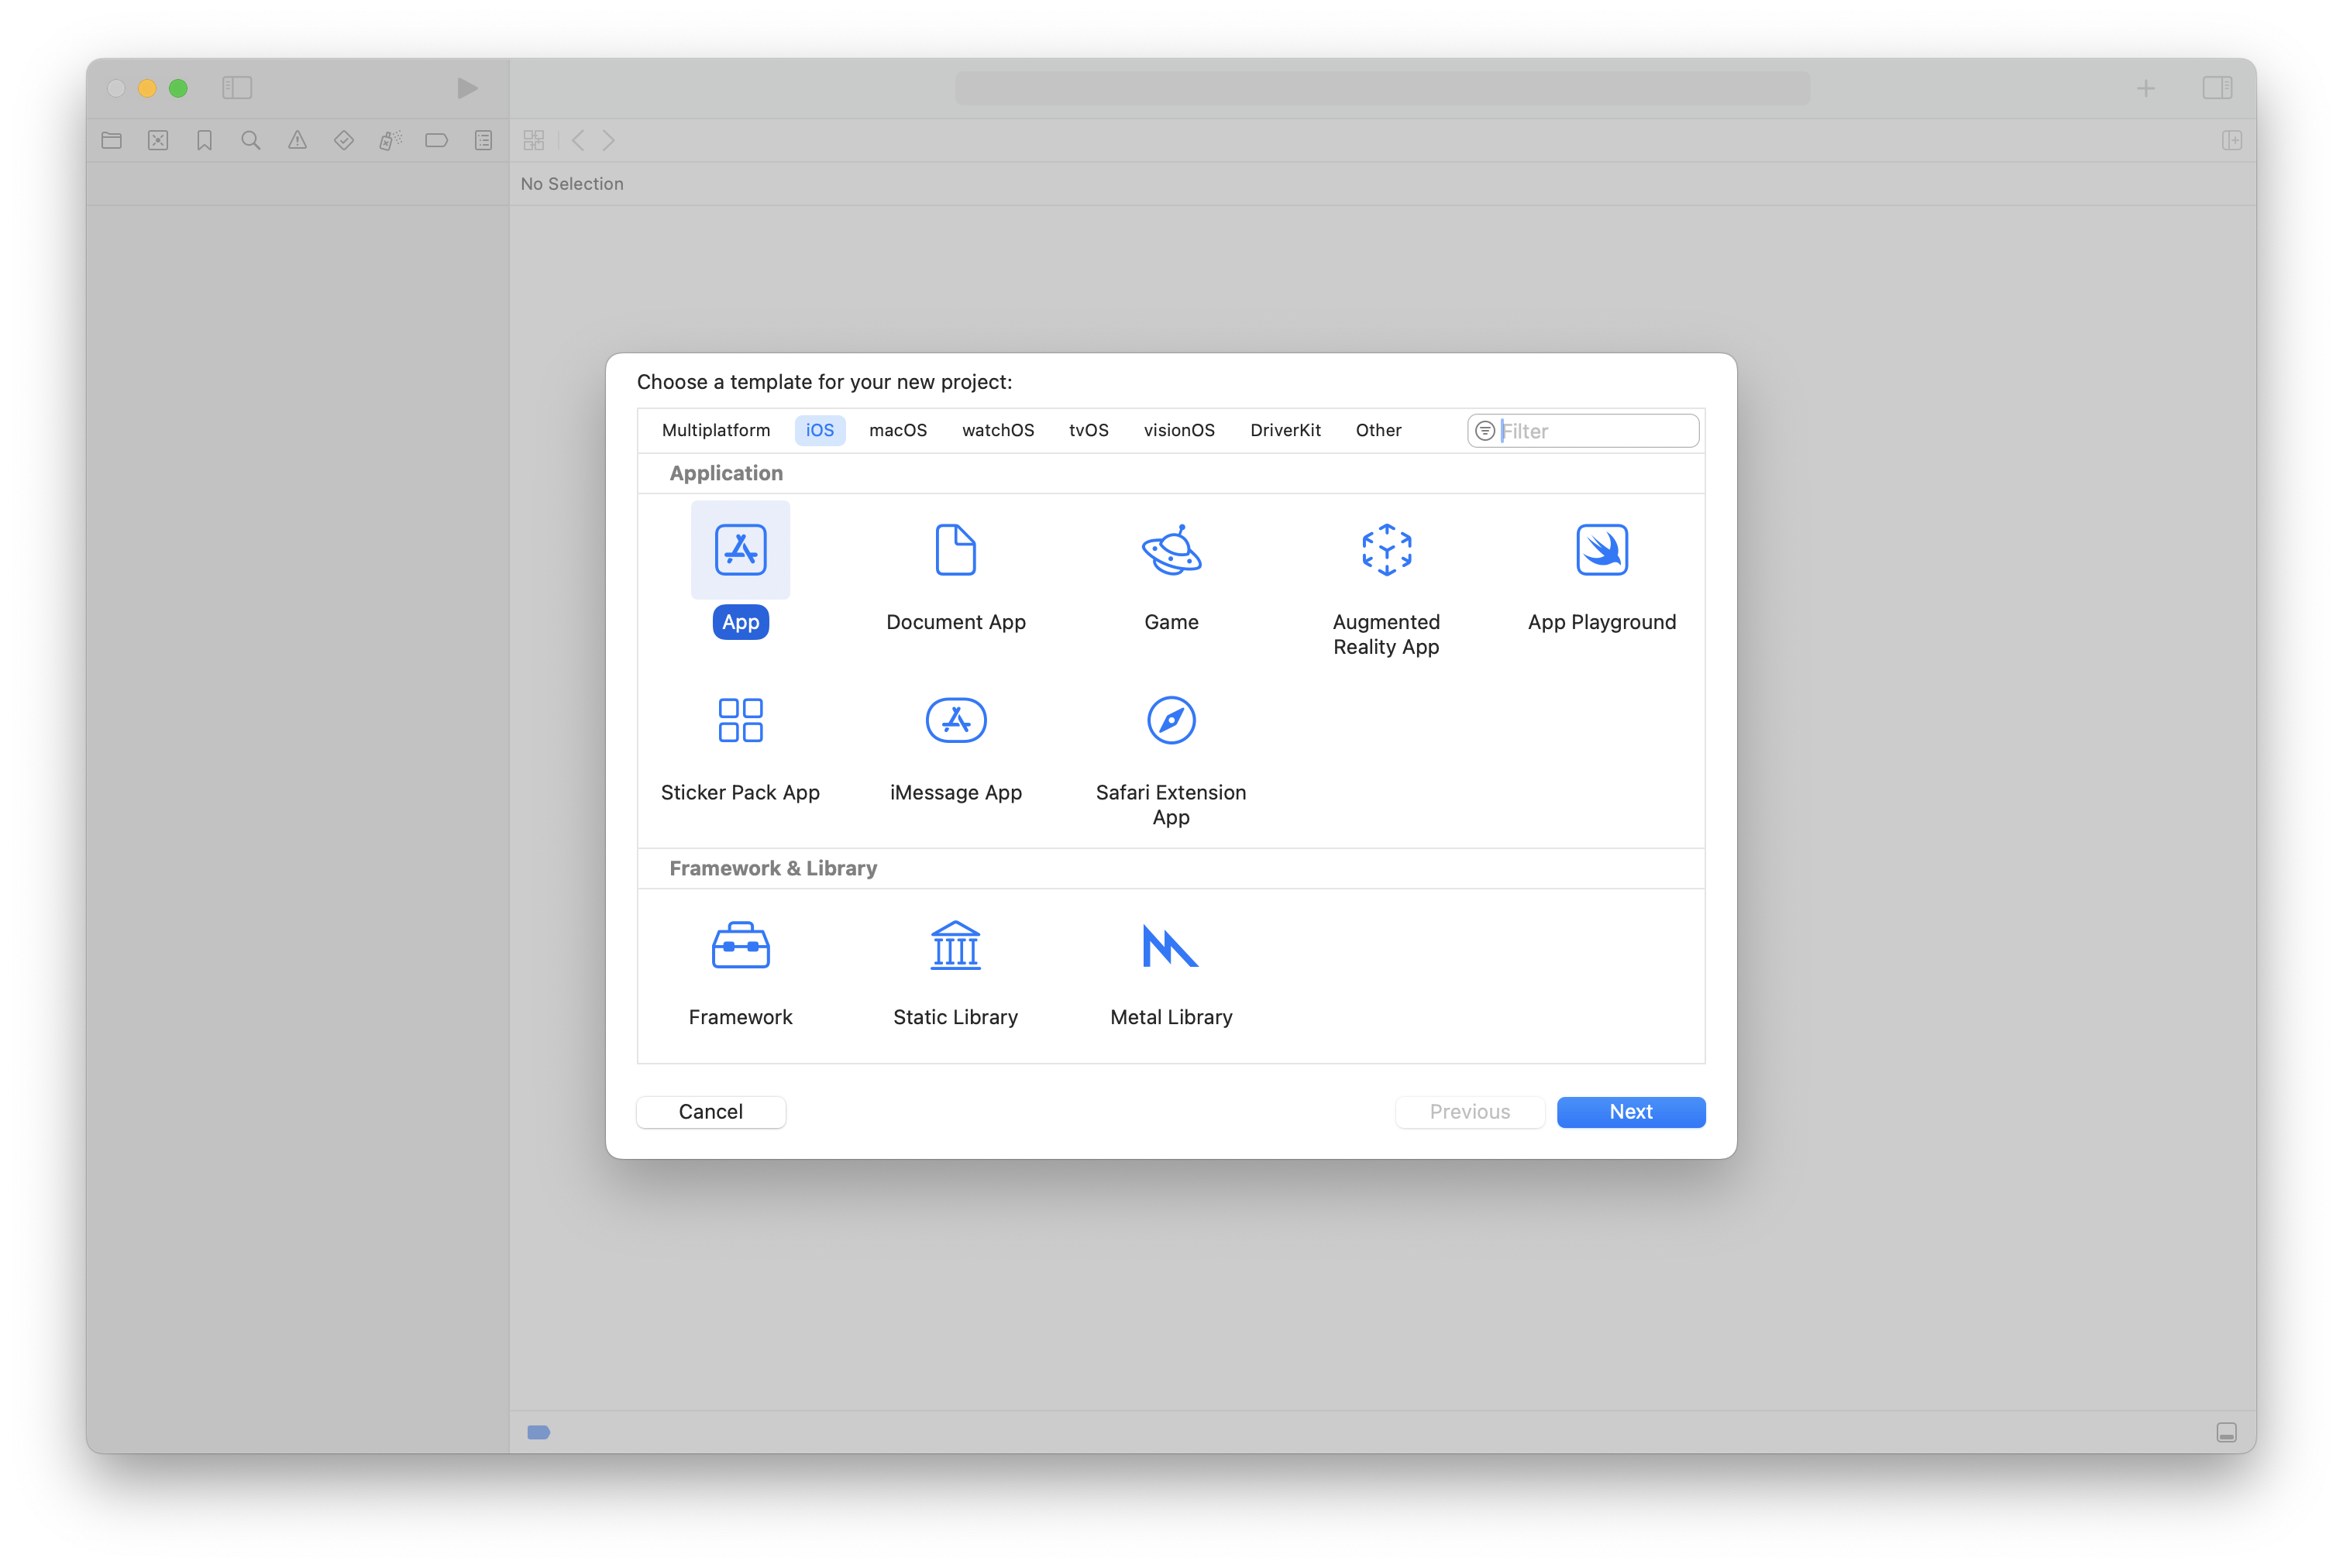
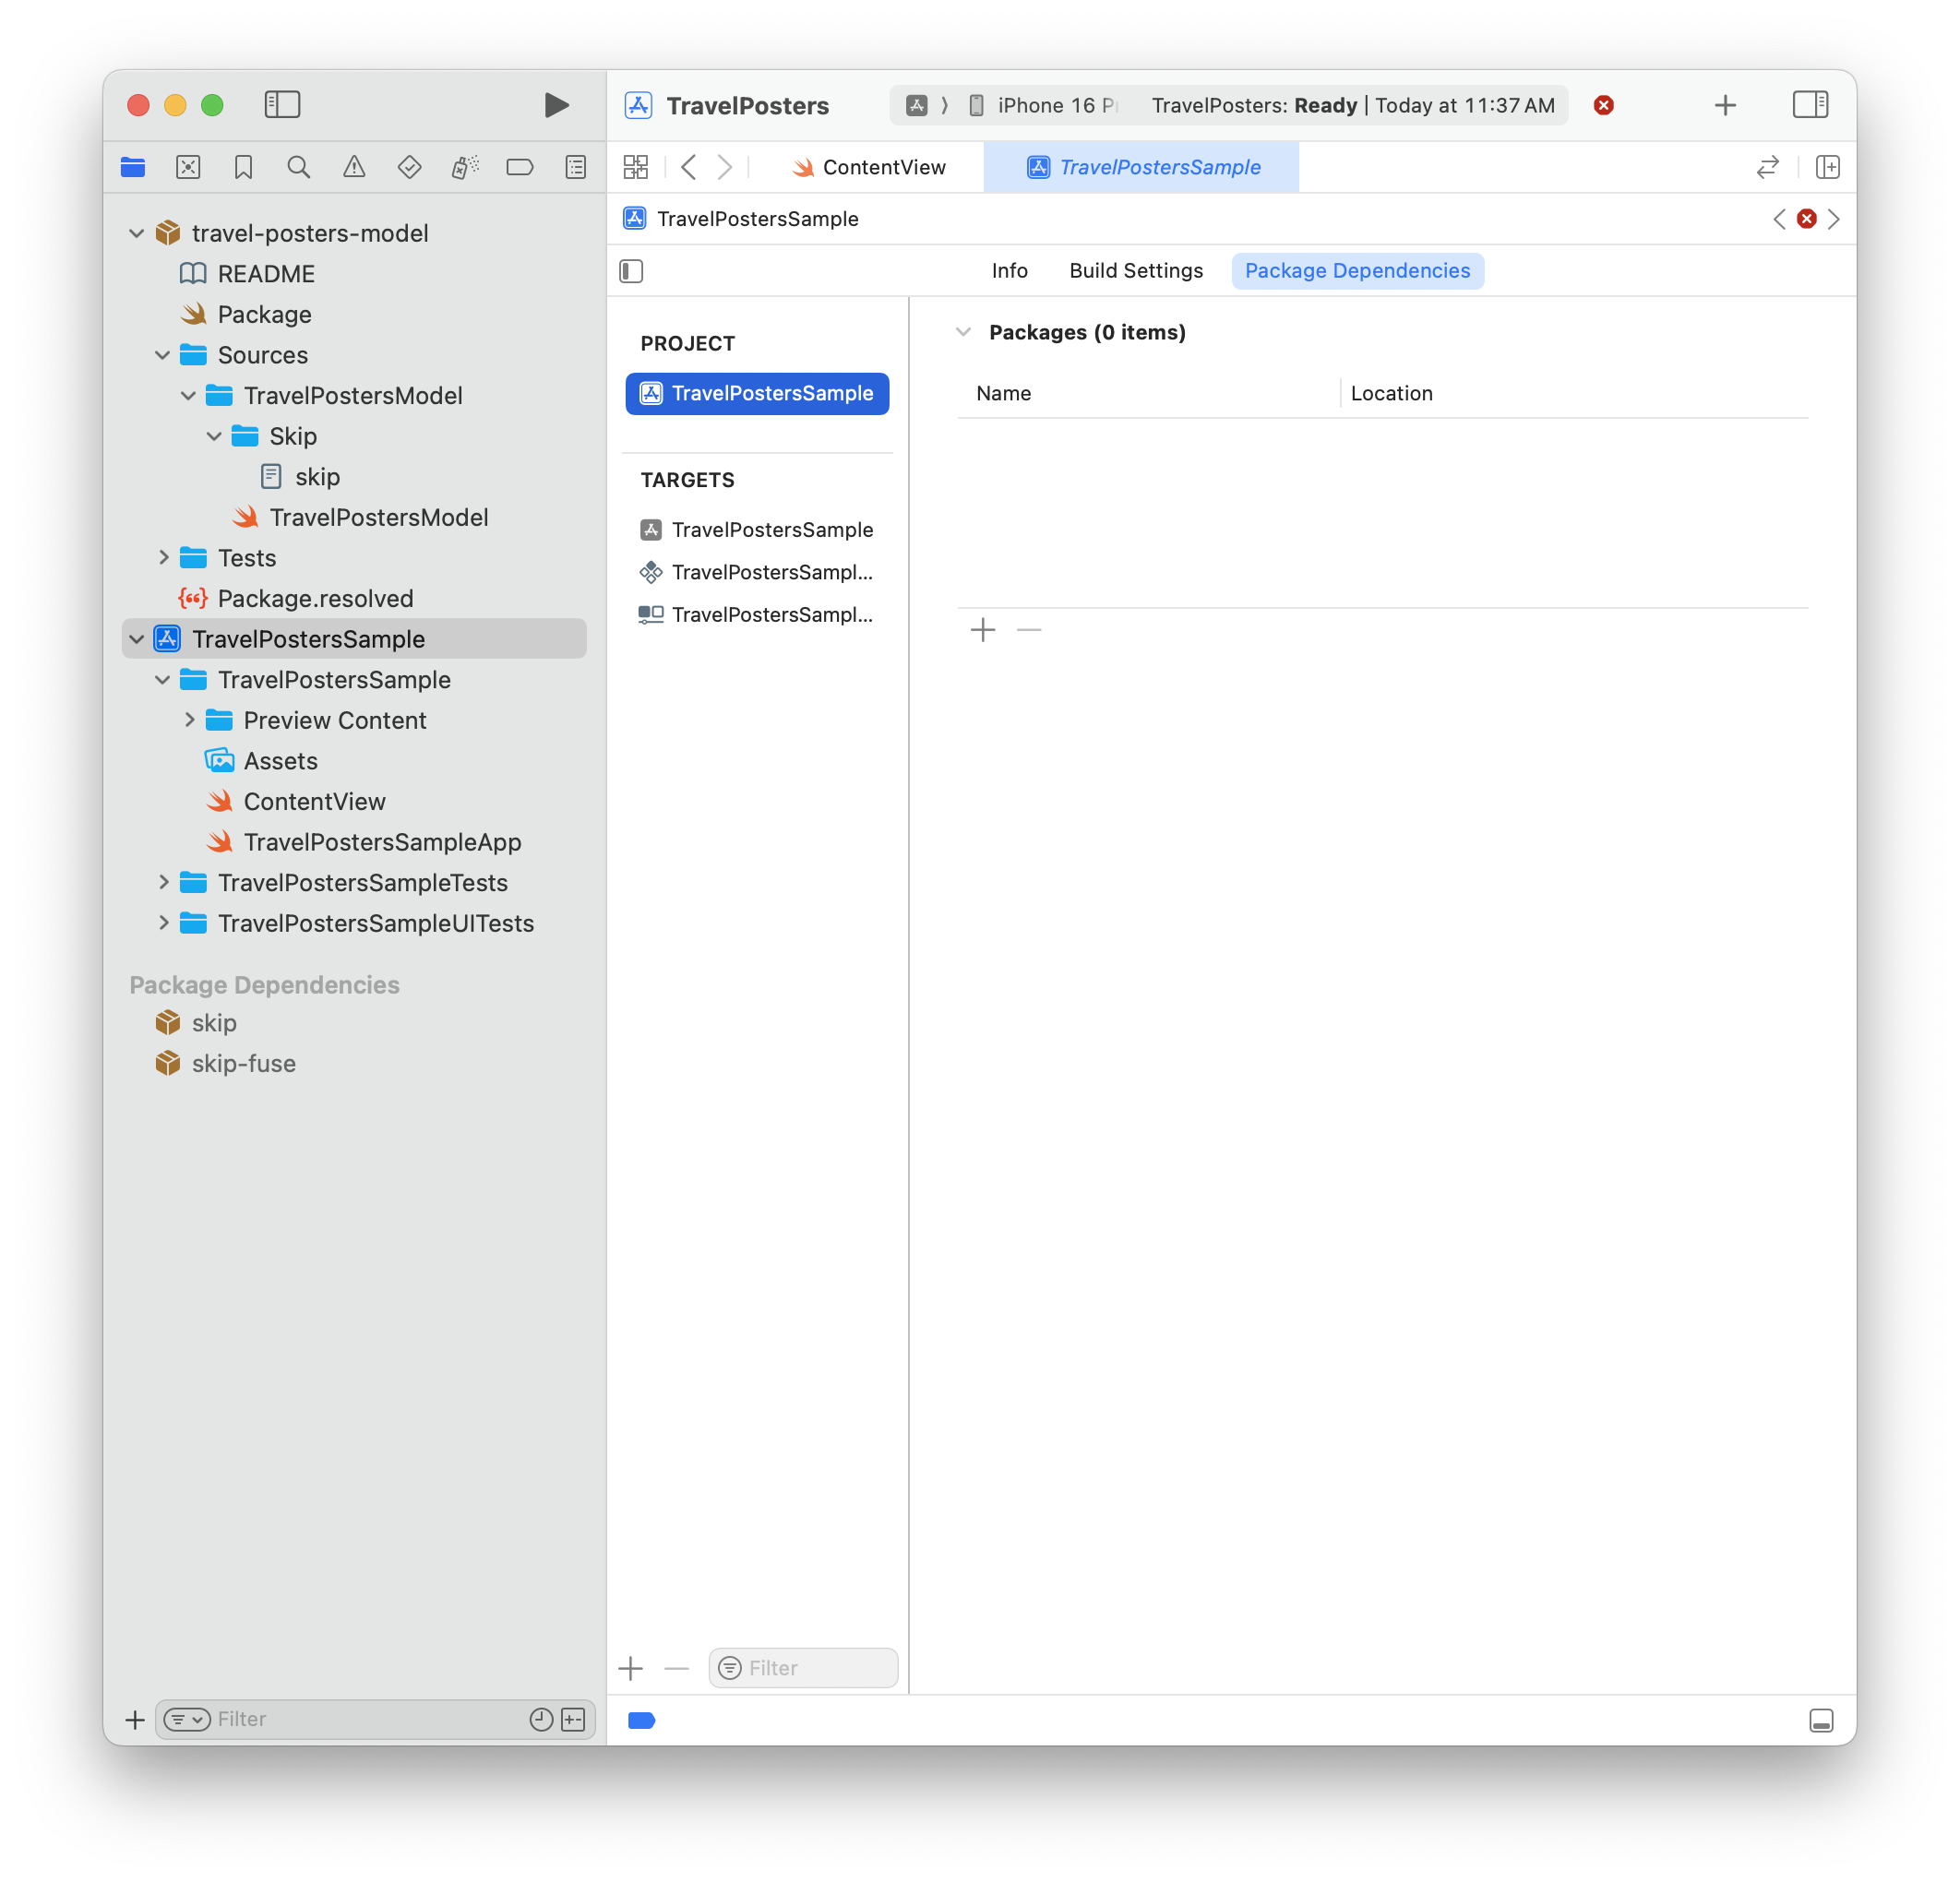
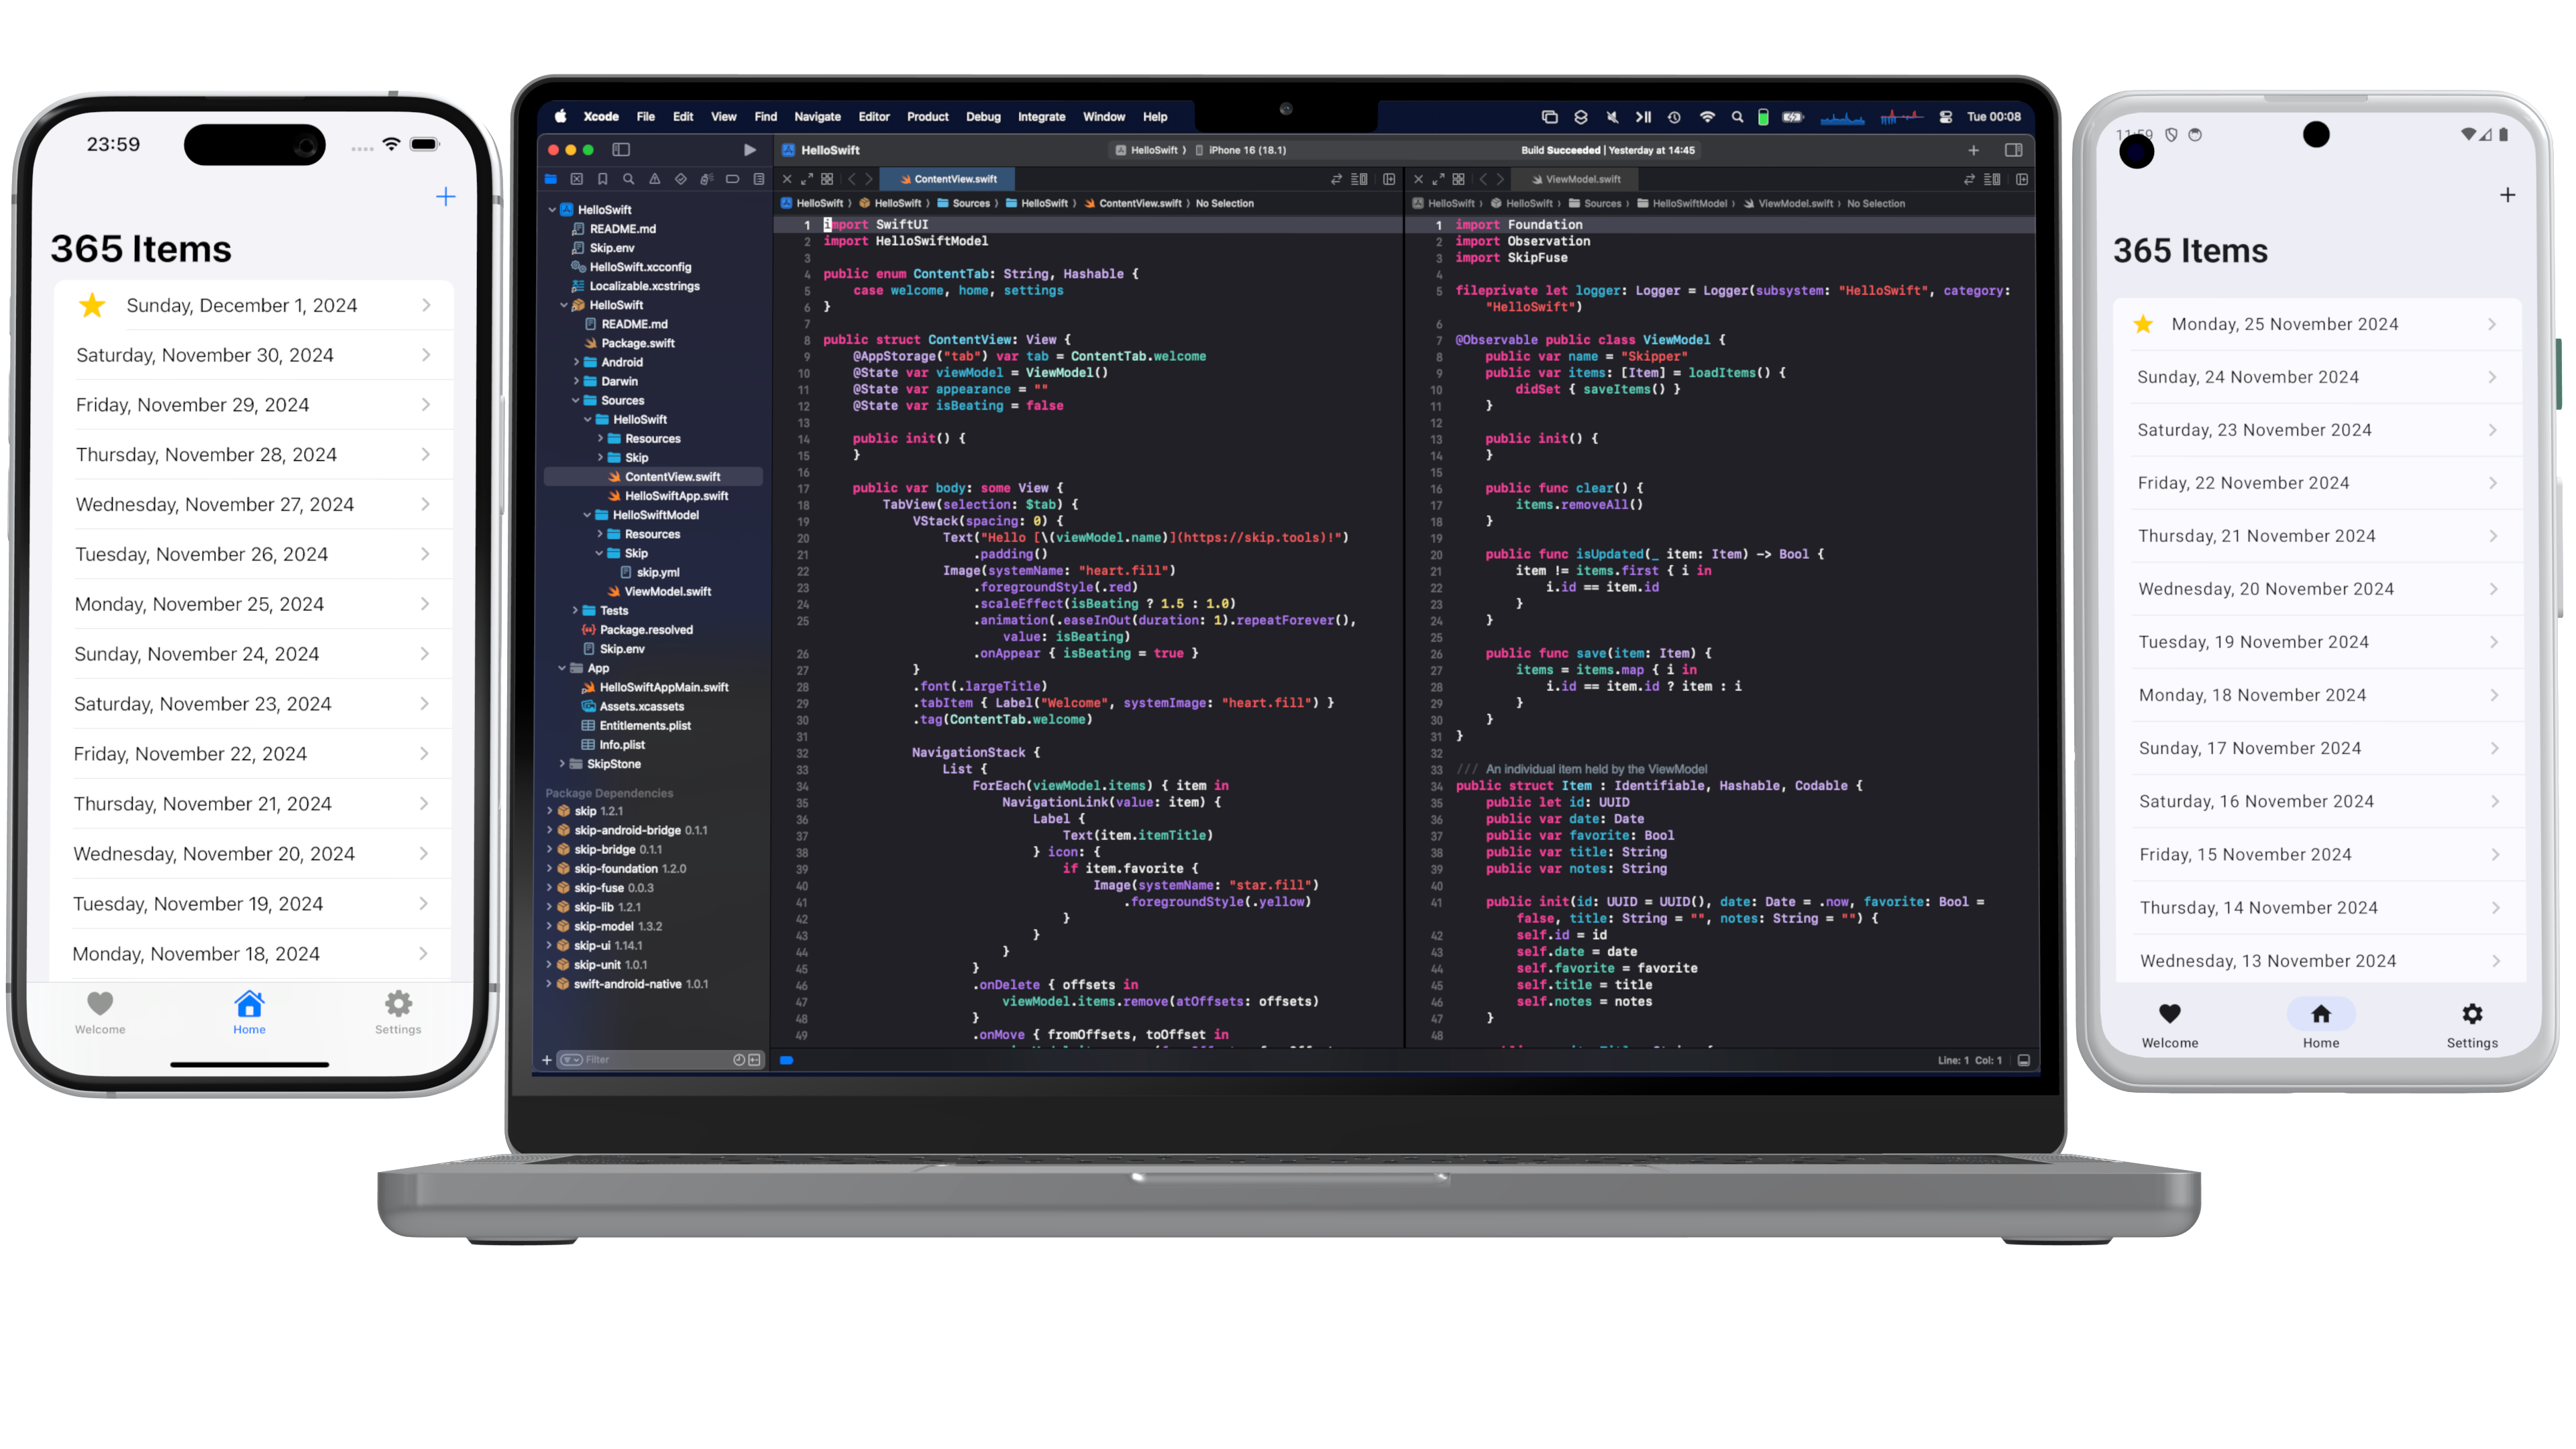
$ skip init --native-app --open-xcode --appid=bundle.id.HowdySkip howdy-skip HowdySkipAssuming the app initialized successfully, your project will open in Xcode. Run the app against an iPhone simulator destination (the first build may take some time) and your app will launch on both the iOS simulator and the running Android emulator at the same time!
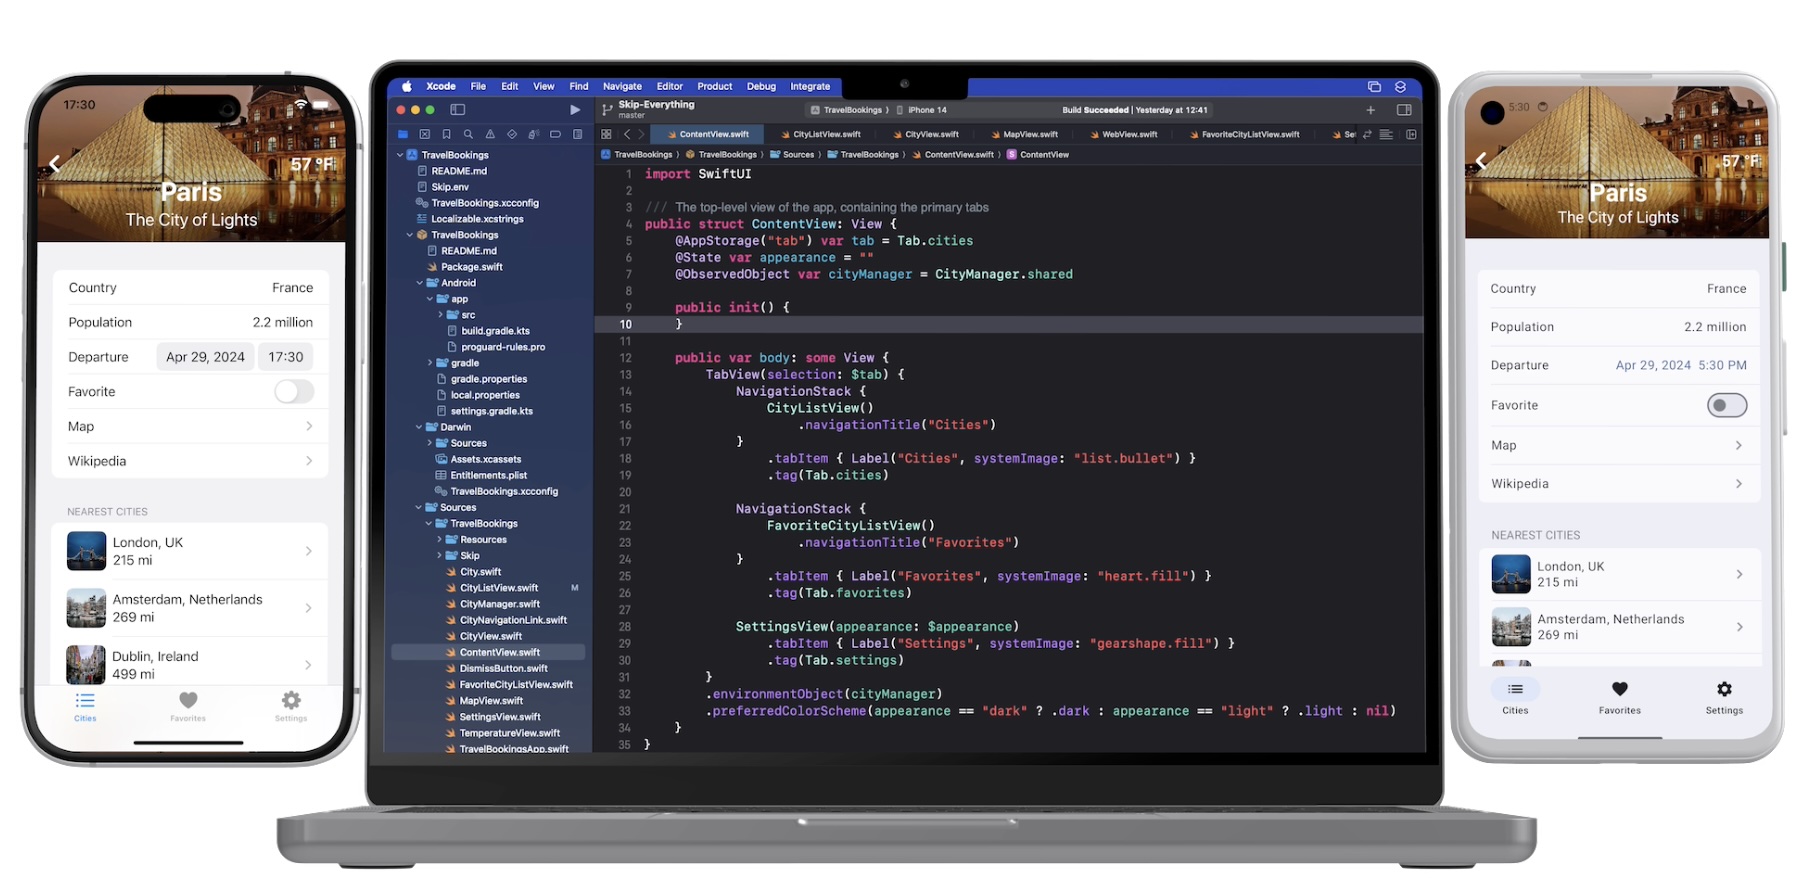
The App Template
Section titled “The App Template”The skip init command creates a template app to get you started. It is a TabView containing a “Welcome” view, a list of editable and re-orderable “Items”, and a “Settings” view:

ContentView.swift
Section titled “ContentView.swift”Rather than importing SwiftUI, you will notice that the Sources/HowdySkip/ContentView.swift ↗ file instead imports SkipFuseUI. When building for iOS, this simply redirects to a SwiftUI import. Skip’s philosophy is to not intrude on the iOS side of the application: on Darwin platforms you are still using direct, non-intermediated SwiftUI, just as if you were building an app without Skip at all.
On Android, however, the SkipFuseUI module bridges the SwiftUI API onto Jetpack Compose ↗, Android’s modern Kotlin ↗ UI toolkit. It does this through the intermediate SkipUI module. Bridging to pure Jetpack Compose gives Android users a fully native user experience rather than the uncanny-valley replica generated by many cross-platform frameworks.

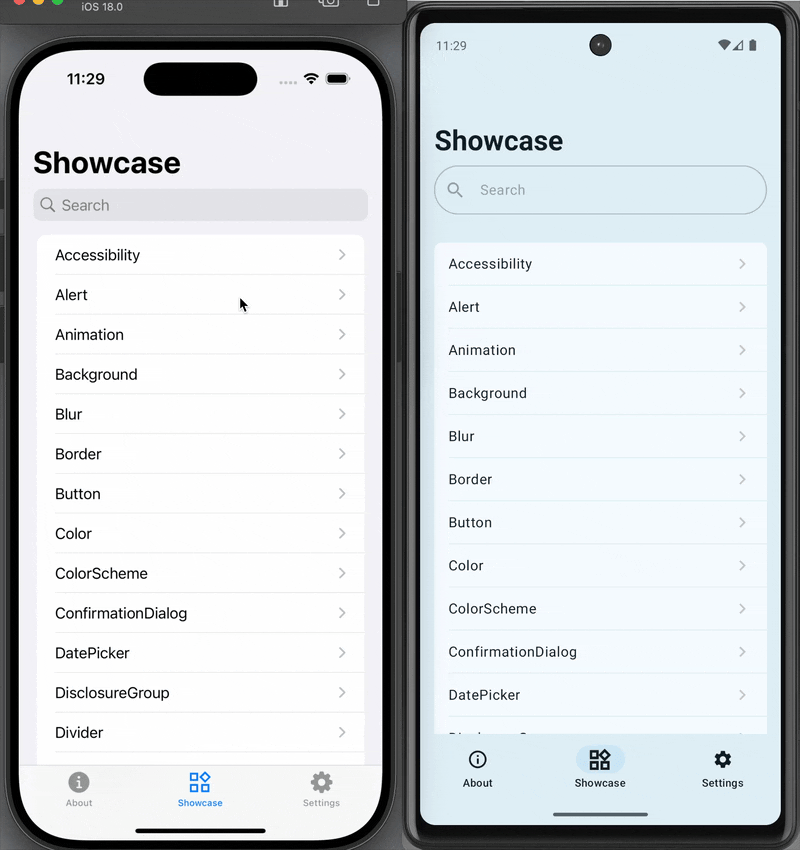
Consult the SkipUI module’s documentation for a listing of currently-supported SwiftUI constructs on Android. You can also examine the Showcase ↗ cross-platform sample app, which displays and exercises most supported SwiftUI components:
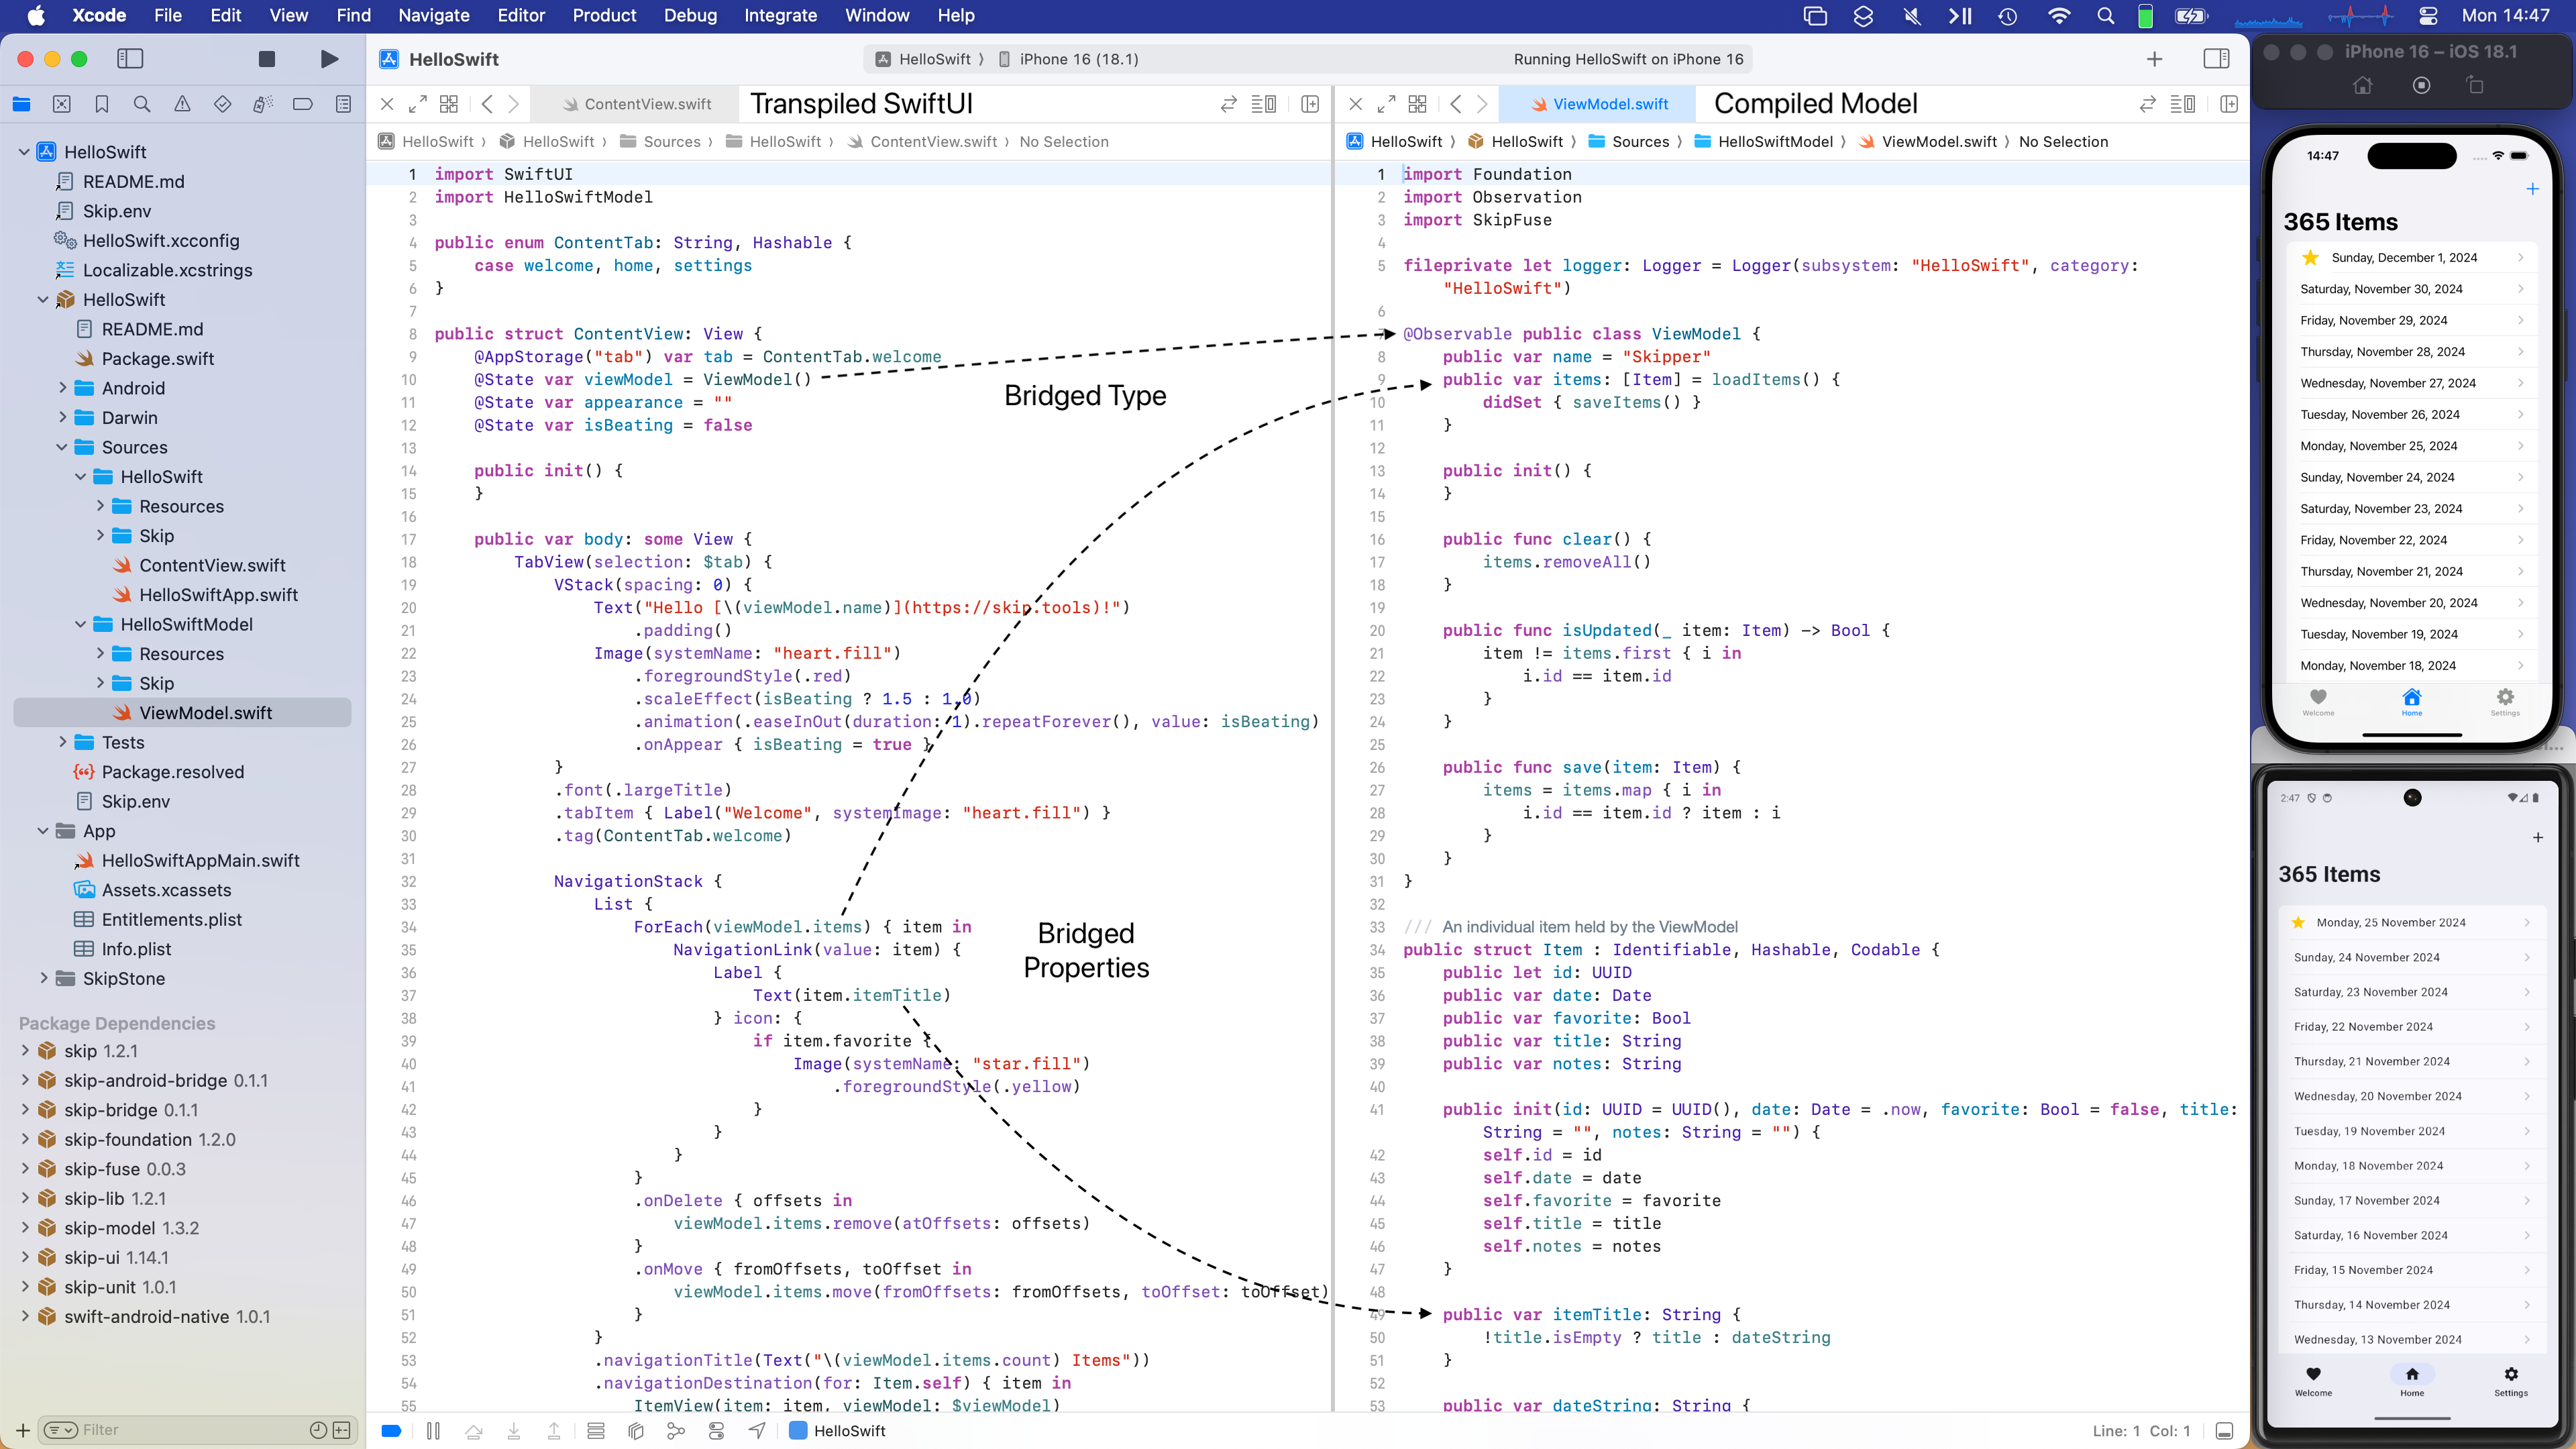
ViewModel.swift
Section titled “ViewModel.swift”The “Items” tab displays an editable list of items which are managed by Sources/HowdySkip/ViewModel.swift ↗, which handles loading and saving the list of items to a simple JSON file. This code uses standard Foundation types (URL, Data, Date, FileManager, JSONEncoder, JSONDecoder, etc.) to handle the management and persistence of the items. Note that unlike the SwiftUI in ContentView, none of this code is bridged into Kotlin: it is using the Apple swift-foundation ↗ types directly, just as on iOS.
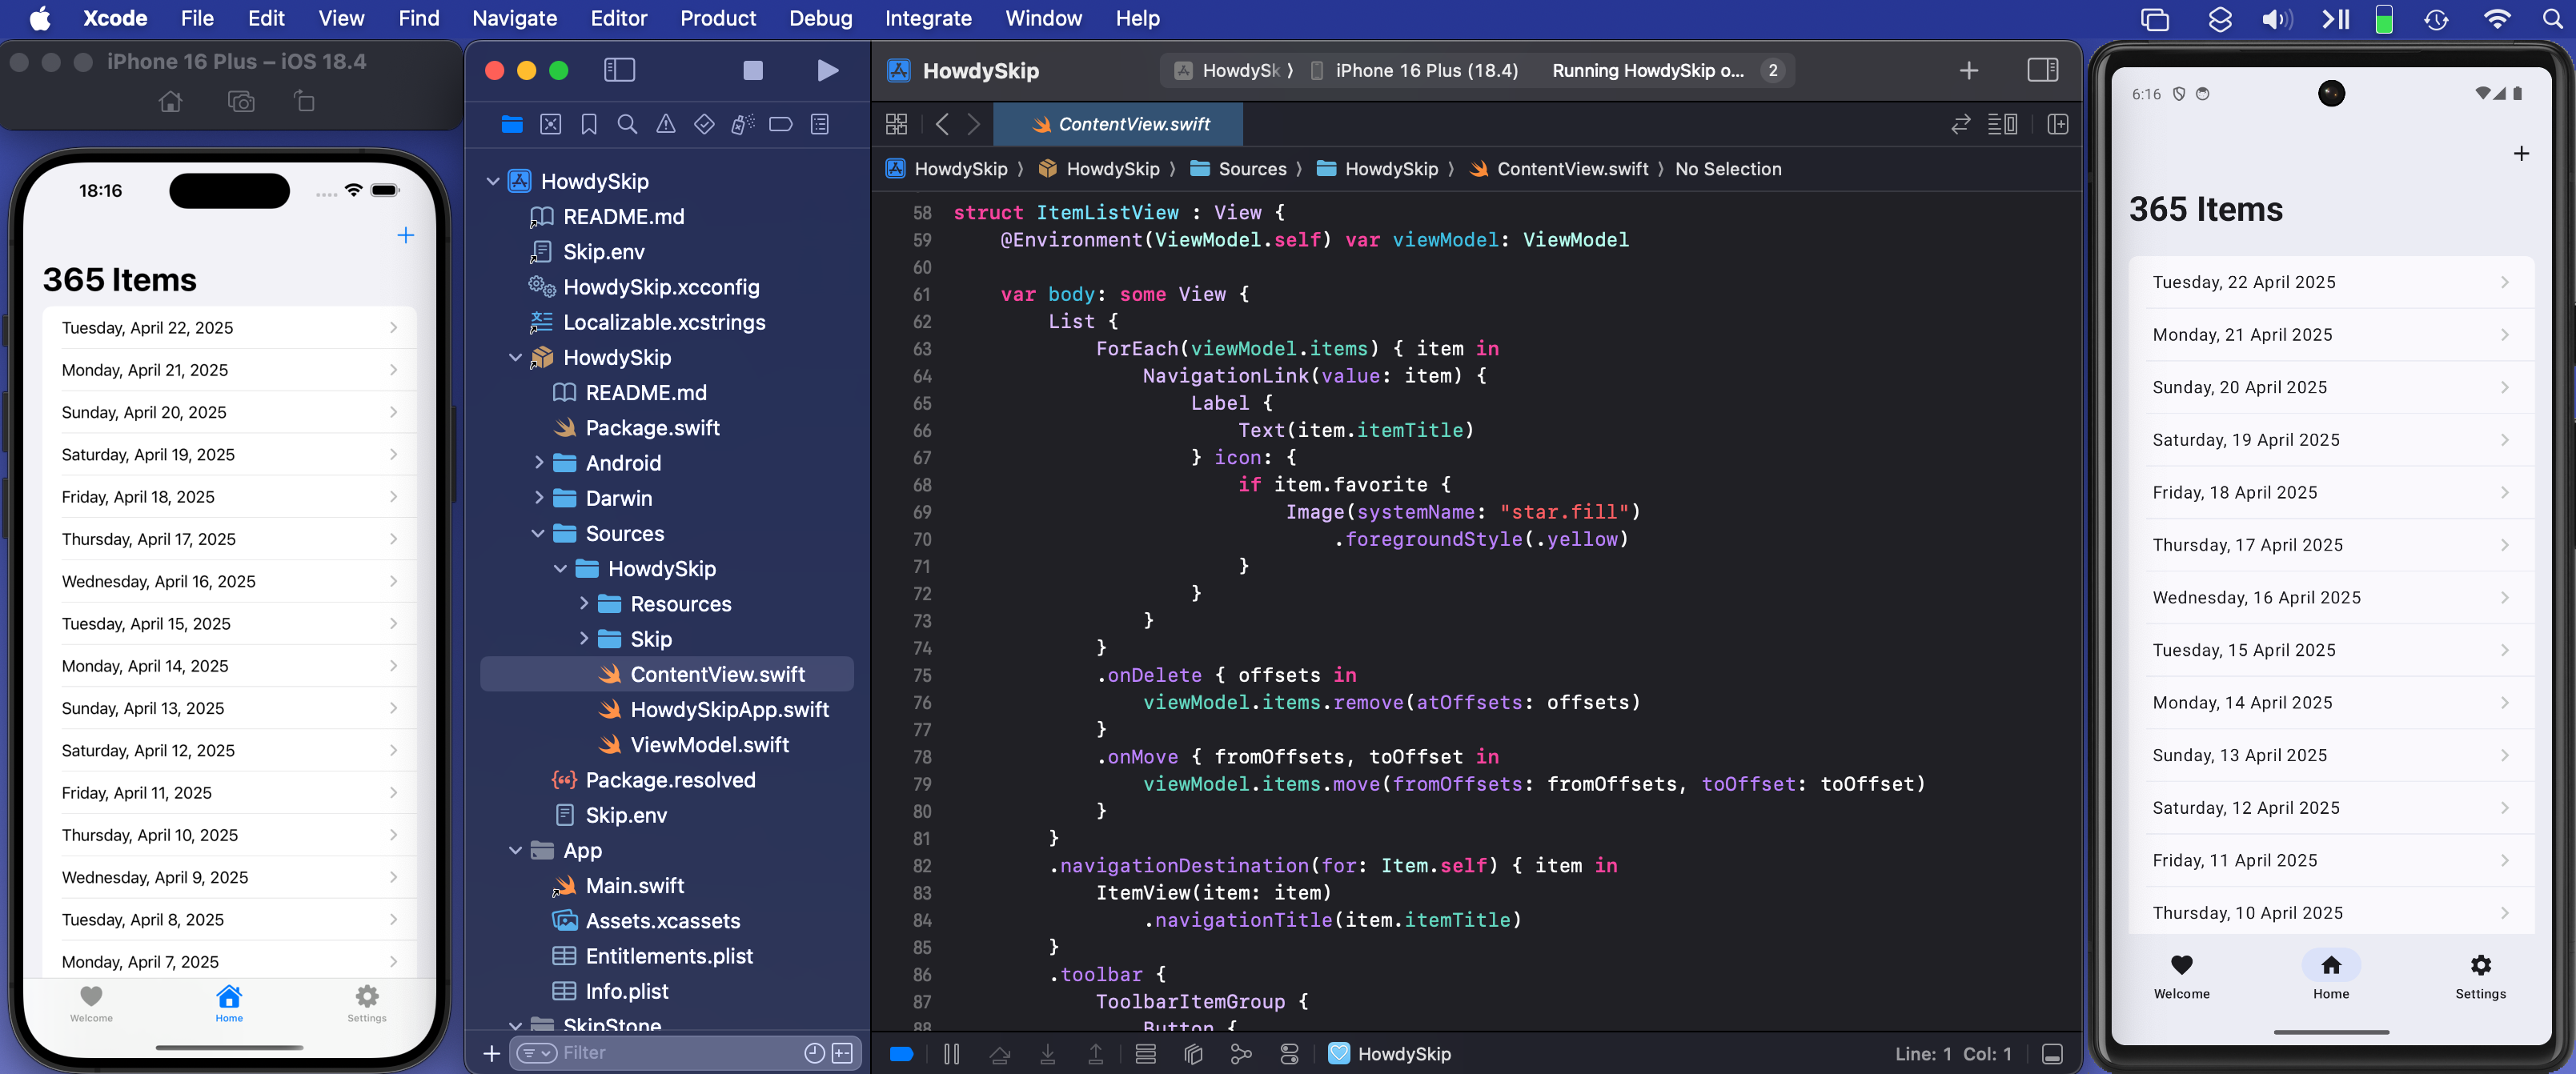
Despite only using native Foundation types, you will notice that ViewModel.swift imports SkipFuse. Just as SkipFuseUI bridges your UI to Android, SkipFuse bridges model-layer code. We use it here to enable our @Observable view model to communicate changes to the Jetpack Compose user interface. This is discussed further in Part 2 of the series. You generally don’t need to be concerned with the details other than to remember to import SkipFuse (or SkipFuseUI) any time you implement an @Observable.
Bridging into Kotlin and Compose
Section titled “Bridging into Kotlin and Compose”The final tab of the sample app is the “Settings” screen. This exposes various settings and displays some information about the app. It also presents a little heart emoji, which is blue on iOS and green on Android.
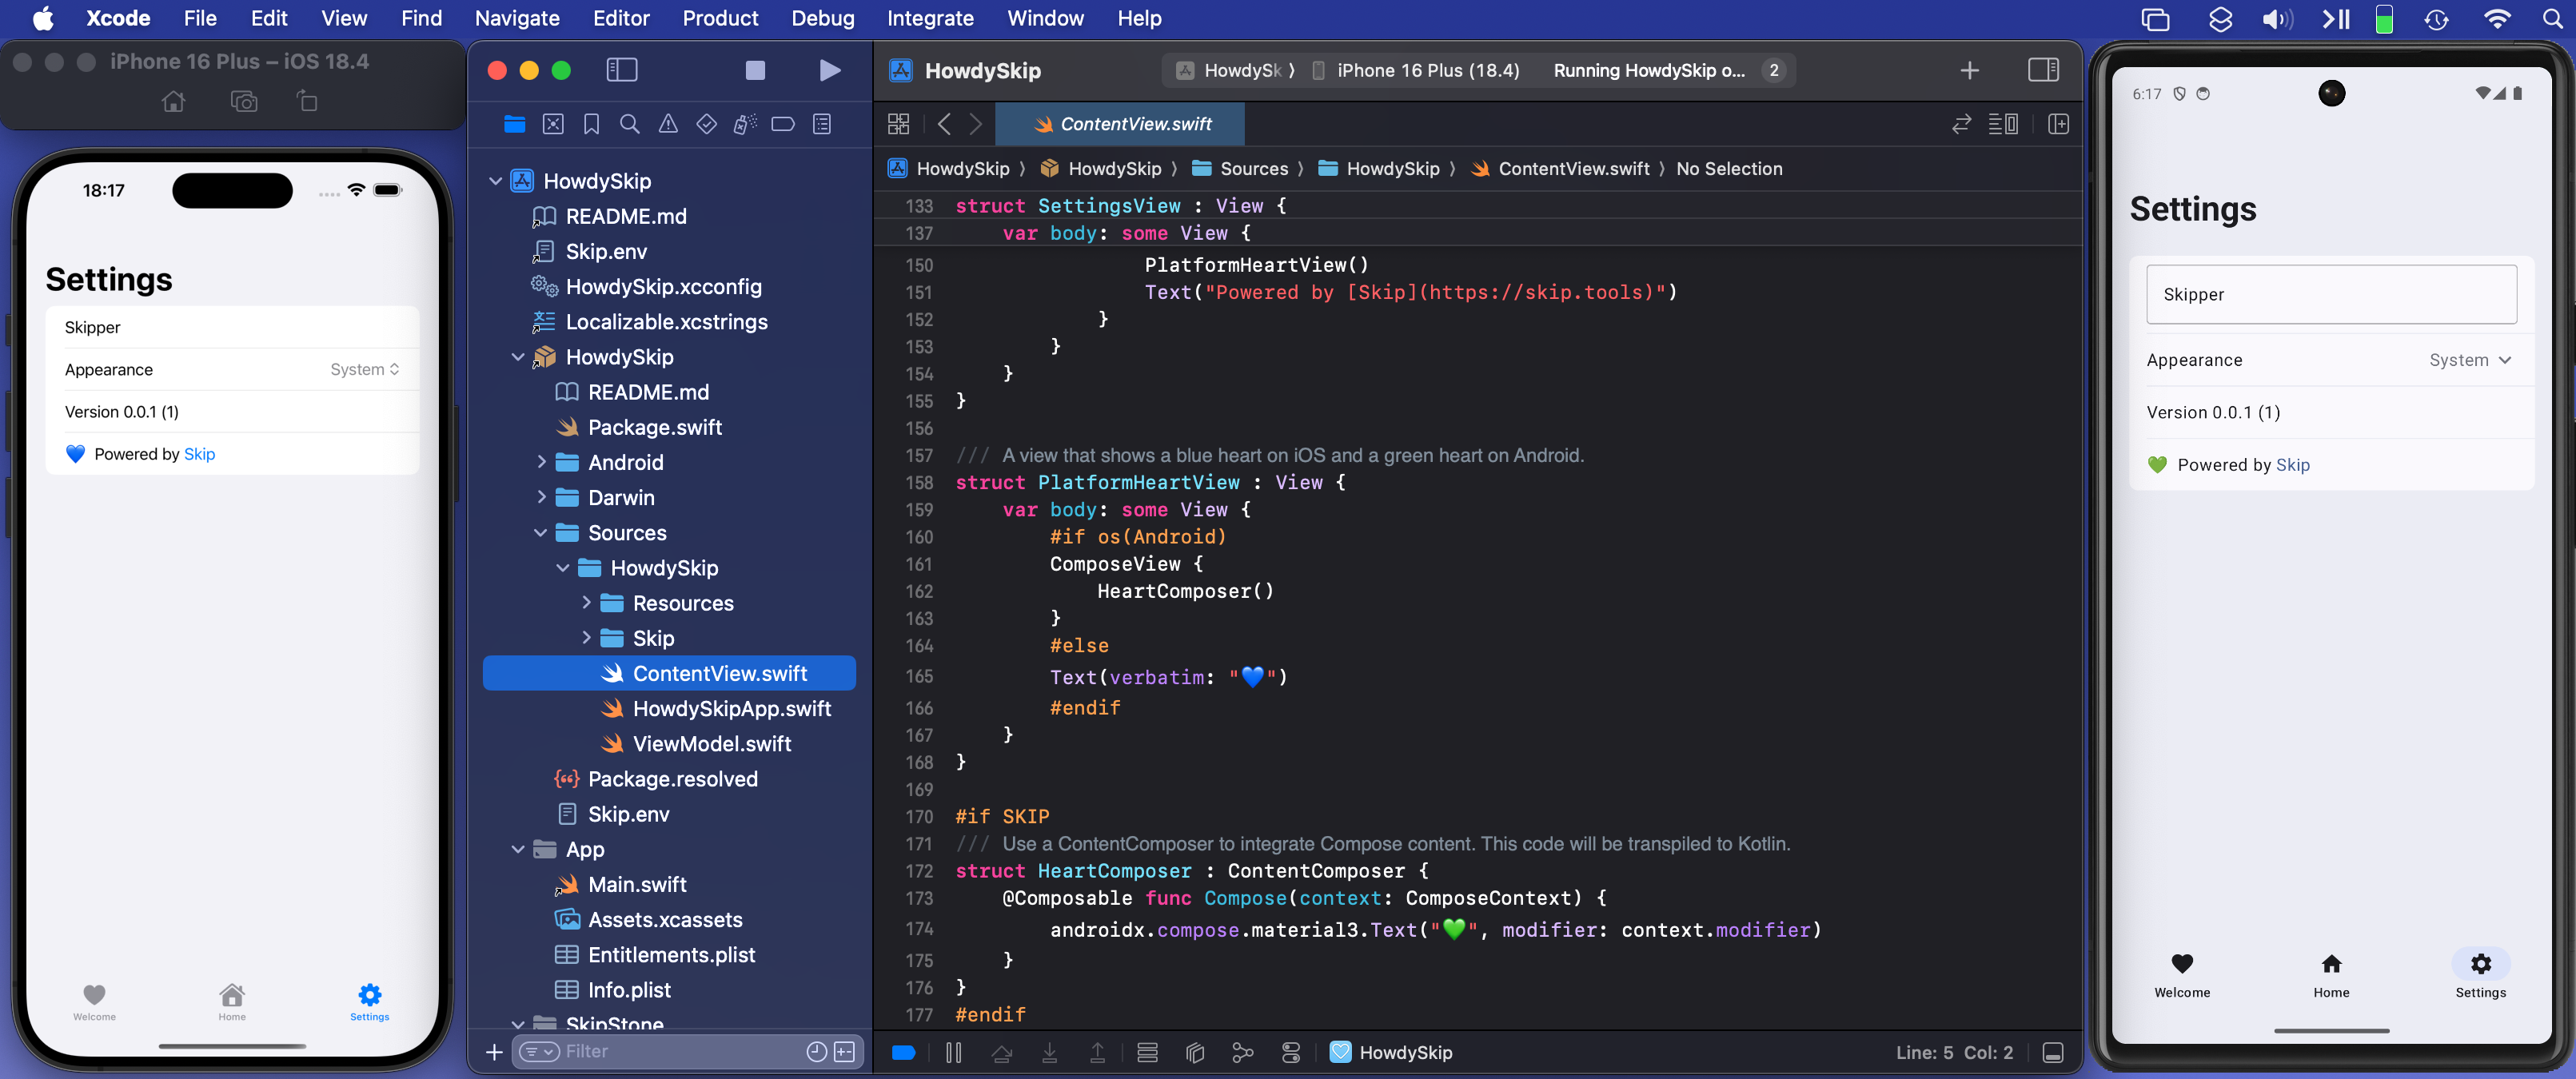
We use the green heart emoji to demonstrate a powerful feature of Skip: the ability to embed code that directly calls Kotlin and Jetpack Compose APIs! Examining the SettingsView in ContentView.swift ↗, you will see the inclusion of a PlatformHeartView, whose implementation looks like this:
/// A view that shows a blue heart on iOS and a green heart on Android.struct PlatformHeartView : View {    var body: some View {        #if !os(Android)        Text(verbatim: "💙")        #else        ComposeView {            HeartComposer()        }        #endif    }}
#if SKIP/// Use a ContentComposer to integrate Compose content. This code will be transpiled to Kotlin.struct HeartComposer : ContentComposer {    @Composable func Compose(context: ComposeContext) {        androidx.compose.material3.Text("💚", modifier: context.modifier)    }}#endif
What is going on here? Notice that on Android, we’re rendering the heart with a ComposeView, a special SwiftUI view for including Jetpack Compose content in the form of a ContentComposer.
/// Encapsulation of Composable content.public protocol ContentComposer { @Composable func Compose(context: ComposeContext)}But how can we define @Composable functions and call Android APIs from within our native Swift code?
The magic lies in Skip’s ability to transpile Swift code into Kotlin, and SkipFuse’s ability to bridge between Kotlin and your compiled Swift. Any code in a #if SKIP block will be transformed into the equivalent Kotlin, so it is free to call other Kotlin and Java APIs directly. The generated #if SKIP Kotlin will also be automatically bridged so that you can call it from your native Swift.

Ecosystem Access
Section titled “Ecosystem Access”The ability to effectively embed Kotlin code is immensely powerful. It not only provides direct access Jetpack Compose and the Android SDK, but also enables you to tap into the complete Android ecosystem of libraries through Kotlin and Java dependencies.
Of course, using native Swift allows you to take advantage of the vast and growing ecosystem of available Swift packages as well. In our post on Bringing Swift Packages to Android we introduced the swift-everywhere.org ↗ site that tracks packages that are successfully building for Android. Since that post, community members have been implementing Android support, bringing the number of known packages that can be used on Android to 2,240! Popular projects like Alamofire ↗, flatbuffers ↗, SwiftSoup ↗, swift-protobuf ↗, and swift-sqlcipher ↗ (just to name a few) can be added directly to your app and used in the same way on both iOS and Android.
Skip’s unique ability to directly call both Swift and Kotlin/Java APIs separates it from most cross-platform development frameworks, where integrating with the host system often requires bespoke adapters and extra layers of indirection.
Skip Showcase
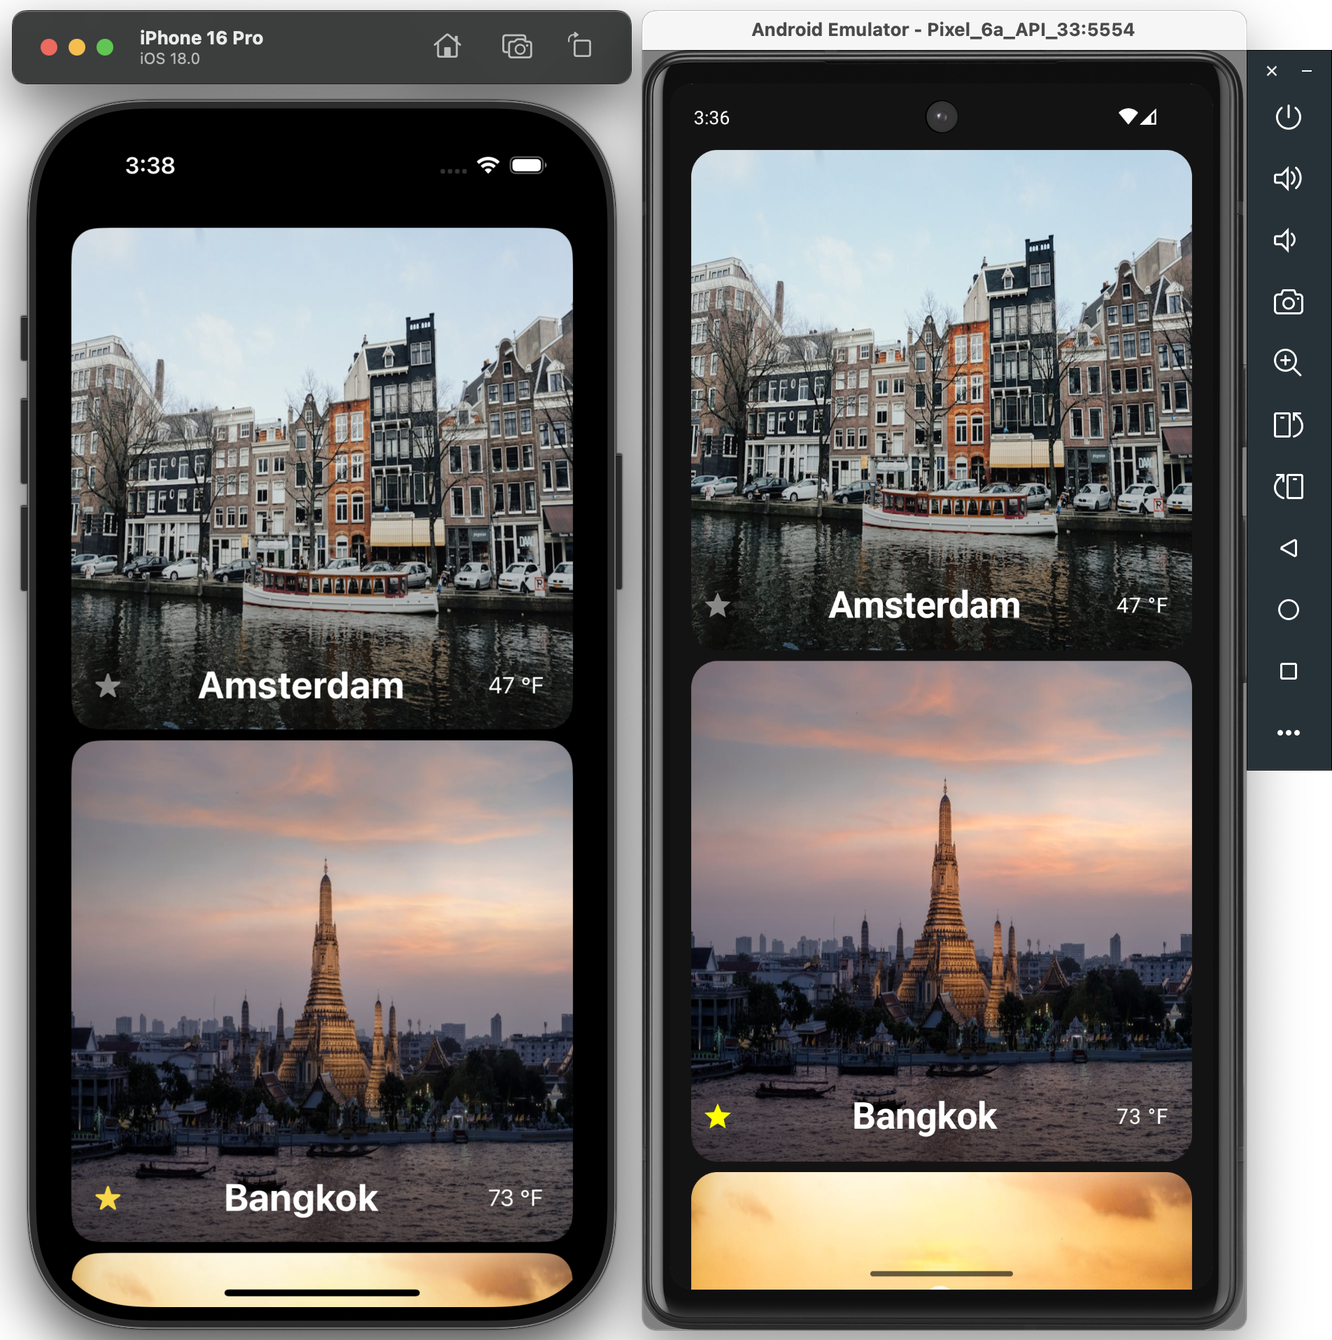
Section titled “Skip Showcase”As a demonstration and validation of this technology, we have published one of our sample apps, Skip Showcase ↗, to both the Google Play Store and Apple App Store. This fully native Swift app demonstrates parity between SwiftUI components on iOS and Android.


Status and Next Steps
Section titled “Status and Next Steps”Despite being generally available, Skip’s native support is currently a technology preview. We are working on updating our documentation, finding and squashing remaining bugs and limitations, reducing build times, and generating smaller Android binaries. Even as a preview, however, you can build complete, production-ready cross-platform Swift apps, as Skip Notes demonstrates.
Cross-platform Swift and SwiftUI have been a dream of ours for a long time. We are immensely excited about the possibilities this unlocks for creating truly best-in-class apps for both iOS and Android from a single codebase!
 {: style=“text-align: center; width: 200px; margin: auto;”}